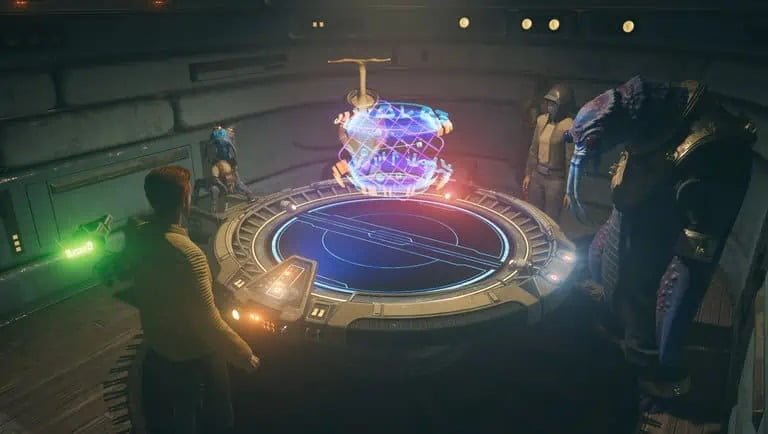
Holotactics is an exciting mini-game that awaits you at the Pyloon Saloon in Jedi Survivor. Once unlocked, you and your opponent will command a variety of units, including enemies that you will encounter throughout your journey. Engage in thrilling battles, pitting your fighters against each other to become the ultimate victor. While the AI randomly battles itself, a good strategy will increase your chances of success.
This guide will provide you with expert advice on how to master the ‘Skoova Steve Holotactics mini-game, allowing you to conquer your opponents and claim the prestigious title of Holotactics Champion. Here, you’ll discover tested and proven winning strategies for every adversary you face. Get ready to unleash your strategic prowess and dominate the competition! Have a look!
How To Unlock Skoova Steve Holotactics

To unlock the ‘Skoova Steve Holotactics mini-game at the Pyloon Saloon, your objective is to recruit the formidable duo of Tulli Mu and Bhima Ook. The task may seem straightforward, except if you struggle with battling Mogus. However, should you successfully rescue them from the clutches of the Mogu, you shall be generously rewarded.
How To Play Skoova Steve Holotactics
Holotactics presents a captivating mini-game that combines simplicity with a challenging twist. Prepare yourself to engage in battles against recordings of your opponents, utilizing preselected units. A unique aspect of this game is that if you challenge an opponent to a rematch, they will consistently employ the same units. You are granted ten spaces on the game board to strategically position your units, with the flexibility to allocate up to five units in the front and up to five units in the back.
It is advisable to station ranged units in the backline to safeguard them from being targeted initially by melee opponents. At the beginning of each match, you are provided with a limited number of Battle Points. During the preparation stage, these points are spent to purchase units that will be deployed on the board. If you possess any leftover Battle Points and emerge victorious in a round, they will carry over to the next round. This enables you to acquire additional units or invest in more potent ones.
When you are ready to commence the match, simply press the “Start Fight” button and relish the spectacle. As the battles unfold, since the AI controls the units, you have no direct influence over their actions. However, you have the freedom to manipulate the camera to gain a better view of the enthralling encounter! Initially, your selection of units may be limited when you first delve into Holotactics. To expand your roster, venture into the vastness of the galaxy and conquer adversaries, allowing BD-1 to scan them. Your options will be broadened, and any newly added units will be featured the next time you interact with the game table.
How To Win Against Each Opponent

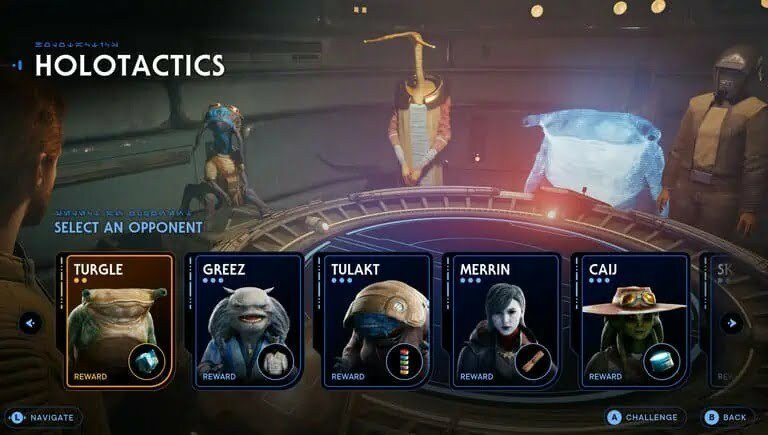
In this segment of the guide, we will delve into the realm of Holotactics and explore the diverse opponents you will face. Get ready to discover winning strategies to triumph over each adversary. The opponents are arranged in ascending order of difficulty, from the easiest on the left to the hardest on the right. As you defeat an opponent, you will earn the prize displayed in the lower right corner of their portrait. It’s worth noting that not all opponents will be immediately available to challenge.
Some require recruitment and instructions on how to do so will be provided in their respective sections. While these strategies have been meticulously tested and proven effective, it’s essential to acknowledge that the AI controlling the units may occasionally make suboptimal decisions. Rest assured, however, that each strategy presented in this guide has undergone rigorous testing to ensure its efficacy.
Turgle
Prepare yourself for the initial and easiest opponent in Holotactics, Turgle. Consider this encounter as the tutorial level, offering a straightforward path to victory. In Wave 1, Turgle will deploy two Scout Troopers, while you’ll have 6 Battle Points at your disposal. Swiftly neutralize them by strategically utilizing an Electrostaff Purge Trooper, which will also grant you an additional 2 Battle Points for Wave 2.
In Wave 2, you’ll be able to afford two Heavy Assault Troopers and a Scout Trooper. Optimize your chances of success by positioning the Scout Trooper in the front line, allowing the Heavy Assault Troopers to unleash their firepower effectively. Triumph over Turgle and your efforts will be rewarded with a Priorite Shard.
Tulakt
When you come face-to-face with Tulakt in Holotactics, the challenges escalate, demanding meticulous planning and strategic prowess. In Wave 1, brace yourself against two Stormtrooper Commanders and a B2 Super Battle Droid. Utilize your 16 Battle Points by placing a Droideka in one of the back corners and positioning a Bedlam Raider Grunt in the middle front. Carry over 1 Battle Point to the next wave, ensuring you have resources to spare.
As you progress to Wave 2, prepare to confront two Raider Grunts and three B1 Battle Droids. With 19 Battle Points at your disposal, adopt a defensive strategy by strategically positioning a Droideka in one of the back corners and deploying two melee B1 Battle Droids to absorb the brunt of the enemy’s assault. This tactical arrangement will fortify your position on the battlefield.
Wave 3 presents a formidable challenge with two Raider Veterans and a Commando Droid. Allocate your 21 Battle Points wisely by placing two Purge Trooper Commanders in the back corners, complemented by a melee B1 Battle Droid in the middle front line. This strategic combination of firepower and defense should prove effective against your adversaries. Emerging victorious against Tulakt will reward you with the highly sought-after Anodized Metals weapon material.
Greez
Get ready to take on Wave 1 of Holotactics, where you’ll encounter Greez and his Stormtrooper Commander accompanied by two Rawkas. Utilize your 16 Battle Points strategically by deploying three Melee B1 Battle Droids and four Stormtroopers. The droids will act as a shield, absorbing damage from the Rawkas while your Stormtroopers swiftly eliminate them. Aim for success as your Stormtroopers target the Commander, paving the way for victory.
Carry forward 5 extra Battle Points to the next wave as a testament to your triumph. Moving on to Wave 2, prepare to face two Scout Troopers and two Stormtrooper Commandos. With 23 Battle Points remaining, strategically position three Melee B1 Droids and two Heavy Assault Troopers. Ensure your Heavy Assault Troopers occupy the back corners, granting them a clear field of view and keeping them away from melee units. This tactical placement will enhance their effectiveness. You will have 8 Battle Points left to fuel your strategy in the upcoming wave.
In Wave 3, gear up to confront two Stormtroopers and a Security Droid. Armed with 24 Battle Points, consider acquiring two Droidekas to efficiently eliminate your adversaries with their devastating power. Alternatively, if Droidekas are not yet available to you, channel all your points into Heavy Assault Troopers, maximizing your chances of success. Emerge triumphant against Greez and claim the coveted Pilot Jacket.
T-IN8
To unlock T-1N8 in Holotactics, make your way to the basement that leads to the Phon’Qi Caverns below the Abandoned Shack in Foothill Falls. Wave 1 presents a challenge in the form of a Gorocco. Strategically position a Droideka in the back corner and place a Melee B1 Battle droid up front to secure victory against this opponent. Moving on to Wave 2, you will encounter a Bilemaw and another Gorocco.
Counter the threat by utilizing the power of two Bedlam Smashers, evening the odds and ensuring success. Prepare for Wave 3, where you can employ my favorite combo: two Droidekas positioned in the back corners. Although this strategy carries some risks, its execution will greatly facilitate the upcoming fourth wave.
In Wave 4, deploy two Droidekas in the back corners, position a Heavy Assault Trooper in the middle back, and place three Melee B1 Battle droids in the front line. This well-balanced formation will enhance your chances of victory against the opposition. Upon emerging triumphant over T-1N8, your efforts will be rewarded with a Datadisc in Holotactics.
Caij
Prepare for Wave 1, where you will face a challenging lineup of a B2 Super Battle Droid, two B1 Battle Droids, and two Rocket Troopers. Your key to success lies in deploying two DT-Sentry Droids equipped with Hammers and Missiles. Position them strategically to entice the enemy units to charge in, greatly enhancing your chances of victory. If you succeed, you will have 8 Battle Points remaining to carry forward.
Transitioning to Wave 2, the strategy becomes more straightforward. Deploy three Heavy Assault Troopers who will overpower the DT-Sentry Droid and launch a coordinated assault on the remaining Shield Trooper from multiple angles. With 8 Battle Points still at your disposal, you will maintain flexibility for the subsequent wave.
As you enter Wave 3, establish a formation with five Heavy Assault Troopers positioned in the backline and a Stormtrooper Commander in the front. This arrangement will enable you to unleash a devastating assault on the enemy forces. Your triumph over Caij will be rewarded with a valuable Bounty Puck in Holotactics.
Merrin
To unlock Merrin in Holotactics, you must embark on the quest to find Cere on Jedha. In Wave 1, prepare yourself to face a Dark Trooper and two Spikers, armed with 25 Battle Points. Employ the strength of two strategically placed Droidekas in the back corners to swiftly eliminate these units. After the victory, you will have 1 spare Battle Point to carry forward to the next wave.
As you progress to Wave 2, once again utilize the power of two Droidekas to neutralize the Sutaban, Hardshells, and Commando Droid. Their combined firepower will provide a decisive advantage in this encounter. Prepare yourself for Wave 3, where you will confront the formidable Skriton.
Blaster bolts will prove futile against this adversary, necessitating the use of melee units. With 33 Battle Points at your disposal, unleash the might of two Bedlam Smashers and a Raider Veteran to overcome the Skriton’s resilience. Upon achieving victory and defeating Merrin, you will be rewarded with a valuable set of Ancient Scrolls.
Tulli
To challenge Tulli, the reigning champion of Holotactics, you must first defeat all previous opponents and prove your skill. In Wave 1, strategically position a Droideka and a Stormtrooper Commander in the back row. Support them with two Raider Grunts placed in the front line to provide cover and protection. This formation will create a strong defensive setup to confront Tulli’s forces.
Prepare for Wave 2, where the opposition may seem overwhelming. However, you have a potent arsenal at your disposal: three Droidekas! Deploy these formidable droids in the back row and reinforce them with two Raider Grunts positioned in the front line. Together, they will synergize and swiftly dismantle Tulli’s forces, paving your path to victory. As you enter Wave 3, repeat the successful strategy employed in Wave 2.
Position three Droidekas in the back row, bolstered by two Raider Grunts in the front line. This formation will maintain a formidable presence on the battlefield and increase your chances of success. For the ultimate challenge in Wave 4, you will face the iconic AT-ST, a classic mech from the Star Wars franchise.
But fear not, for you possess a superior force: three Droidekas! Strategically position these mighty droids in the back row, and assign melee units to act as meat shields in the front line. With this tactical formation, you will overcome the AT-ST and emerge victorious against Tulli. Your triumph over Tulli will not go unrewarded. You will be granted a Skill Point in Holotactics.
Skoova
To recruit Skoova in Holotactics, make your way to Foothill Falls. In Wave 1, you will face a challenge that can be overcome with a single Skriton, thanks to its immunity against Heavy Assault Troopers. The Skriton will swiftly dispatch the Shield Troopers, leaving you with 8 additional Battle Points to carry into the next wave. Moving on to Wave 2, employ a strategic positioning strategy by placing two Droidekas in the back corners and positioning a Raider Veteran in the middle front.
The Raider Veteran will act as a shield, absorbing missile attacks while the Droidekas unleash their firepower on the remaining enemies. This tactical arrangement will significantly increase your chances of success. As you progress to Wave 3, the challenge becomes more manageable. Deploy two Droidekas in the back corners to effectively handle the incoming opposition.
In Wave 4, defeating a lone Skriton will be sufficient. Utilize any spare Battle Points to bolster your lineup, ensuring the Skriton remains part of your strategy. Achieving victory against Skoova will reward you with the coveted Mustache and Patch in Holotactics. However, utilizing Droidekas can be a powerful strategy in Holotactics, thanks to their versatility and firepower and after you win the matches against all opponents and become The Champion, you will also earn the Gambler achievement
How To Beat Every Opponent In Skoova SteveHolotactics

Here is a step-by-step resume of a comprehensive walkthrough that provides a perfect, easy-to-execute, and guaranteed-to-work strategy against every opponent in Holotactics, the mini-game from Star Wars Jedi Survivor:
Turgle
1. Electrostaff Purge Trooper
2. 2x Heavy Assault Troopers + 1x Scout Trooper
Greez
1. 3x Melee B1 Battle Droids + 4x Stormtroopers
2. 3x Melee B1 Droids + 2x Heavy Assault Troopers
3. 2x Droidekas or Heavy Assault Troopers
Tulakt
1. 1x Droideka (back corner) + 1x Bedlam Raider Grunt (middle front)
2. 1x Droideka (back corner) + 2x Melee B1 Battle Droids (front middle)
3. 2x Purge Trooper Commanders (back corners) + 1x Melee B1 battle droid (front middle)
Merrin
1. 2x Droidekas
2. 2x Droidekas
3. 2x Bedlam Smashers + 1x Raider Veteran
Caij
1. 2x DT-Sentry Droids armed with Hammers and Missiles
2. 3x Heavy Assault Troopers
3. 5x Heavy Assault Troopers (back) + 1x Stormtrooper Commander (front)
Skoova
1. 1x Skriton
2. 2x Droidekas (back corners) + 1x Raider Veteran (middle front)
3. 2x Droidekas
4. 1x Skriton
T-1N8
1. 1x Droideka (back corner) + 1x Melee B1 Battle droid (front)
2. 2x Bedlam Smashers
3. 2x Droidekas
4. 2x Droidekas (back corners) + 1x Heavy Assault Trooper (middle back) + 3x Melee B1 Battle droids (front)
Tulli
1. 1x Droideka (back) + 1x Stormtrooper Commander (back row) + 2x Raider Grunts (front)
2. 3x Droidekas (back) + 2x Raider Grunts (front)
3. 3x Droidekas (back) + 2x Raider Grunts (front)
4. 3x Droidekas (back) + Any melee units you want (front)
- Travel Hotel Manager Reveals Terrifying Reason You Should Never Use The Toiletries
- Brittney Griner To Miss Two WNBA Games To Focus On Mental Health
- Moment Cardi B Tosses Mic As Concertgoer Throws Drink At Her On Stage
- Messi Confirms He’s Going To MLS Club Inter Miami
- Prince Harry Says Rumors About James Hewitt As His Biological Father Is To Oust Him From The Royal

